May 21, 2026 · 10 min read
Side Imaging vs. Down Imaging vs. 2D Sonar for Underwater Recovery
A plain-language guide to the three Humminbird sonar channels SAR and dive recovery teams use — what each one actually shows, when to choose which, and how to think about coverage, range, and shadows during a real search.
By HumVision Team · HumVision
If you are new to a dive recovery team or working your first few side imaging passes as a SAR boat operator, the question of side imaging vs down imaging for recovery comes up fast. Your unit gives you three channels. They are not interchangeable. Picking the wrong one for the pass you are about to run can mean you sweep a quarter-mile of shoreline and miss the target by twenty feet because you were watching the wrong picture.
This post is the answer to that question, written for people working a case rather than people chasing dinner. It explains what each Humminbird channel actually sees, how to think about coverage during a real search, what shadows tell you about a target, and which channel belongs in which moment of the operation.
The three channels you have to choose from
Every Humminbird unit a recovery team is likely to be running gives you the same three core channels, plus a higher-resolution version on newer hardware.
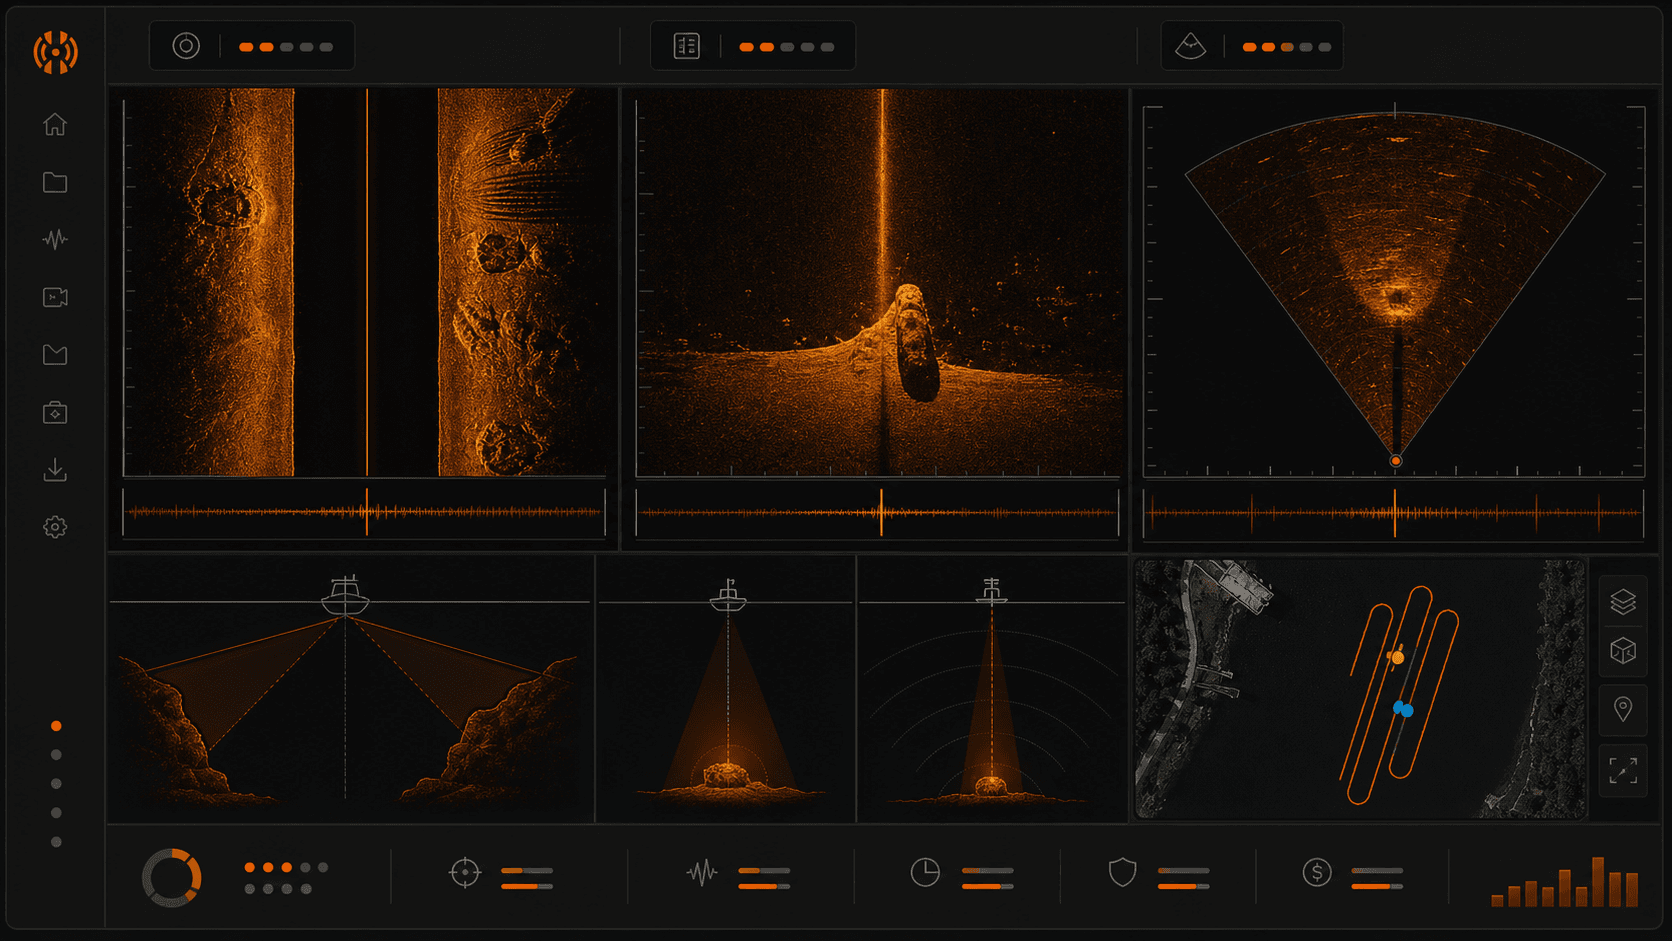
2D sonar is the traditional cone-shaped ping pointed straight down at the bottom. It is the oldest of the three and the one most operators recognize first. It shows you a vertical slice of the water column directly beneath the transducer.
Down Imaging is a high-frequency, narrow-beam channel also pointed straight down. The output looks more like a photograph than a graph. You see the bottom directly under the boat with enough detail to read shape and texture.
Side Imaging sweeps two high-frequency beams out to the left and right of the boat. As the boat moves forward, those beams paint a continuous strip of the lake floor on either side. The result is a long photo-like ribbon of the bottom extending well past the hull in both directions.
MEGA is not a fourth channel. It is a higher-frequency, higher-resolution version of Side Imaging and Down Imaging available on newer Helix, Solix, and MEGA-branded units. When this post says "Side Imaging," MEGA Side Imaging is included unless noted otherwise.
That is the full menu. Humminbird channels explained for SAR are not more complicated than that. The complexity is in knowing when to use which.
What each channel sees, in recovery terms
2D
2D sees a vertical column of water beneath the boat. It is excellent for reading depth, bottom hardness, and anything suspended in the water column between the surface and the floor. It is the only channel that meaningfully sees mid-water targets. A body that is neutrally buoyant at fifteen feet over a forty-foot bottom will show as a return on 2D and will not show on Side Imaging or Down Imaging, because those channels are reading the bottom.
What 2D gives up is horizontal coverage. The cone is narrow. You are essentially looking at a single line beneath the boat as you move. As a primary search tool over a large area, it is slow and easy to miss with.
Down Imaging
Down Imaging is a high-frequency, narrow beam pointed straight down. The picture is photo-like in clarity but the swath is small, usually a strip directly under the hull. This is not your search tool. The geometry does not cover enough ground per pass to clear an area efficiently.
Down Imaging is a verification tool. When Side Imaging flags something at the edge of a sweep and you want a cleaner look, you turn the boat, idle directly over the contact, and read it on Down Imaging. The detail you get from directly above usually settles whether you are looking at a snag, debris, or something worth sending divers to.
Side Imaging
Side Imaging is the search channel. Two high-frequency beams angle out from either side of the transducer and the boat's forward motion stitches a wide image of the bottom together pass by pass. A single line of travel can cover a swath measured in hundreds of feet. That is the geometry that makes a real area search possible inside an operational window.
When to use side imaging is the easiest question on this list. Use it any time you are clearing ground.
Coverage math for a search pattern
Side imaging range underwater recovery numbers vary by unit, water depth, and frequency, but the working math is straightforward.
At typical recovery speeds of 1 to 3 mph and a side imaging range of about 80 feet per side, a single pass covers roughly 160 feet of bottom width. Slower speeds give you cleaner imagery because the ping density per linear foot of bottom is higher. Faster than 3 mph and you start to stretch the picture and miss small targets.
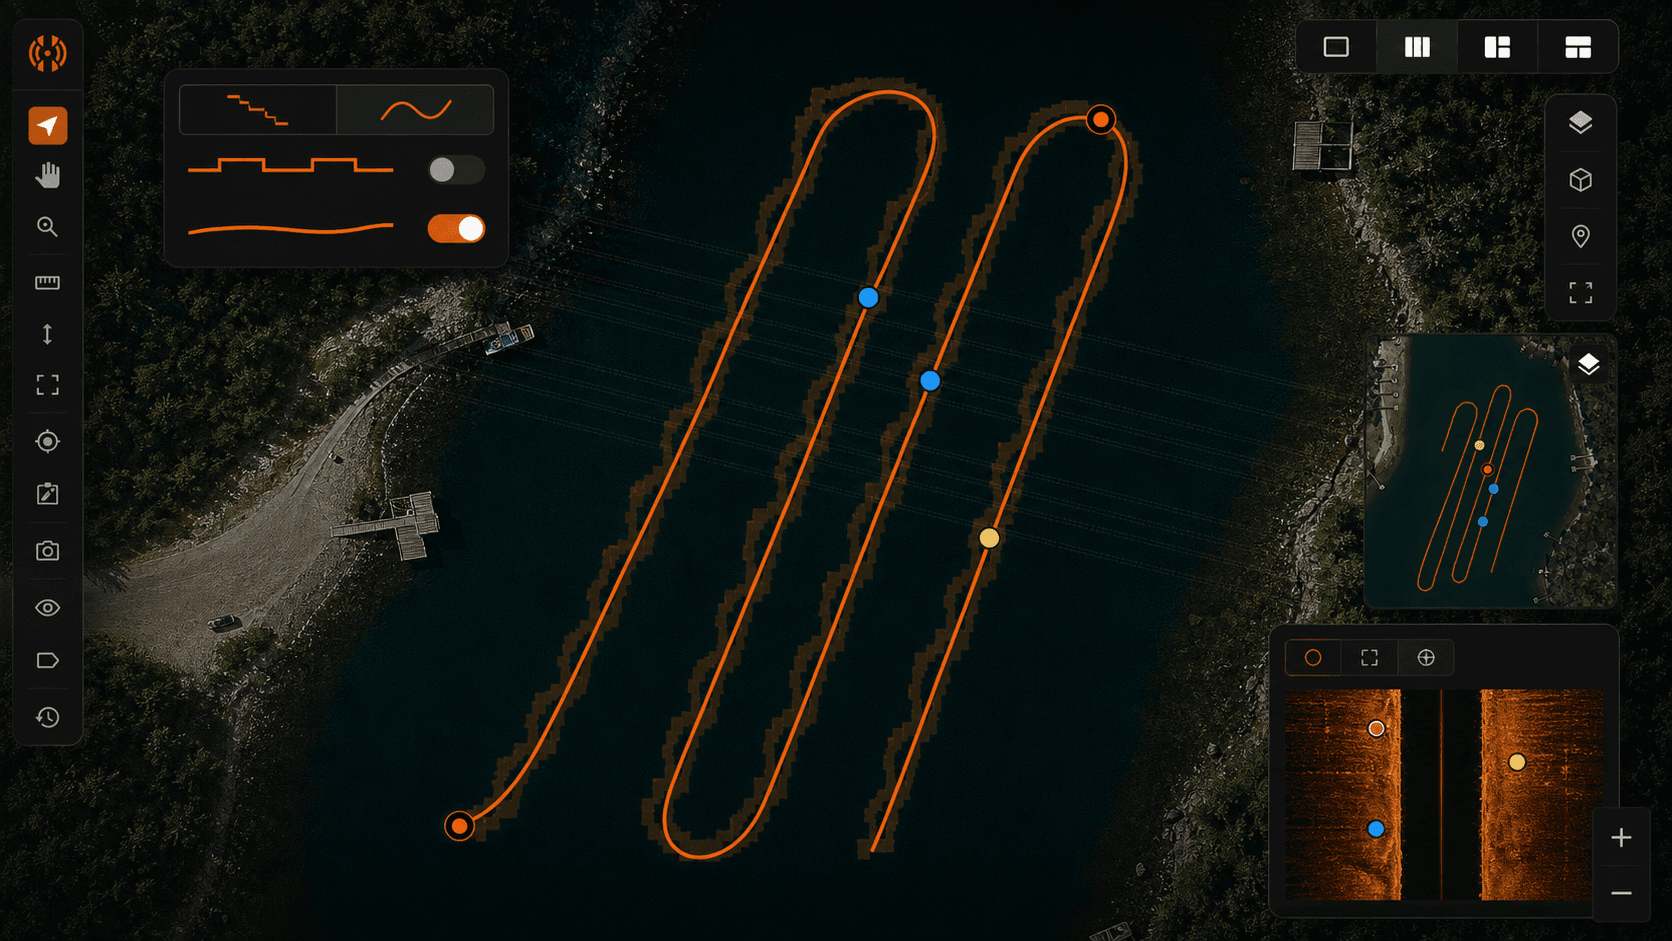
Your search pattern needs overlap. Plan 30 to 40 percent overlap between adjacent passes. So if your effective per-side range is 80 feet, your next parallel track should be no more than about 110 feet over from the last one, not 160. There is a reason for that overlap, and it is not a safety margin in the abstract.
Side Imaging has a known dead zone directly beneath the boat. The beams angle outward, which means the column of water and bottom immediately under the transducer is not imaged by Side Imaging at all. That center stripe is what 2D and Down Imaging cover. If you plan zero-overlap passes, anything sitting under the boat's track on pass one is invisible to Side Imaging until pass two covers that strip from the side. Overlap closes that gap. So does running Down Imaging or 2D in a split view while you sweep.
Why "shadows" matter in recovery
A shadow on Side Imaging is the dark trace behind a target where the sound pulse was blocked from reaching the bottom. The target itself shows as a bright return. Immediately past it, in the direction away from the boat, is a dark streak. That streak is information.
Shadow length is proportional to target height. If you know your altitude above the bottom and the slant distance to the target, the geometry resolves. A six-foot shadow on a target sitting forty feet out from a boat running over thirty feet of water means the target is standing roughly eighteen inches off the bottom. The exact number depends on the trig, but the principle holds: a long shadow means a tall target.
This matters for recovery because it helps you separate junk from interest. A flat tire lying on the bottom casts almost no shadow. A body in repose casts a shadow consistent with the height of a human form on its side, which is a different shape and length than a log, a barrel, or a tire. Trained reviewers learn to read shadows as fast as they read the bright return itself. That skill is part of why the best sonar type for finding bodies in open water is Side Imaging with a careful shadow read, not just any high-resolution channel.
Range vs. resolution trade-off
High frequency gives you resolution. Lower frequency gives you range. The two pull in opposite directions and you cannot have both at once.
MEGA Side Imaging at 1.2 MHz produces the cleanest image any consumer side imaging unit currently puts on a screen, but the effective range is shorter than 800 kHz or 455 kHz Side Imaging on the same hardware. Standard 455 kHz reaches farthest with the least detail. 800 kHz sits in between.
The recovery recommendation is two-stage. Scan the search area first at the longest range you can still read clearly, given water depth and clarity. This clears ground fast. Then re-scan promising sections at higher frequency and shorter range to confirm or eliminate contacts. This is the same logic you would use with any wide-area search tool. Cover ground at low resolution, then verify at high.
GPS quality matters more than people expect during this second pass, because the re-scan needs to land you back over the contact within a few feet, and a unit producing GPS stairstepping will smear the second look. Worth knowing before you commit to the pattern.
When to use which channel, by scenario
Open water primary search. Side Imaging, MEGA if your unit has it. Plan a pass pattern with 30 to 40 percent overlap. Run 1 to 3 mph.
Confirming a contact. Down Imaging at idle speed, directly over the suspected target. Mark the waypoint from the Side Imaging hit, idle back, and read what Down Imaging gives you from above.
Steep drop-offs and bottom contour. 2D. The vertical profile is what you need to understand the slope, and Side Imaging gets confused on steep terrain because the geometry assumes a relatively flat bottom.
Brush, weeds, and submerged structure. Side Imaging at slower speeds, closer to 1 mph. Be ready for a noisy picture. The structure itself creates returns that can mask a target, and there is no clean fix for that other than slower passes and tighter overlap.
Sub-surface or suspended targets. 2D. This is the only channel that reads the water column. Side and Down both look at the bottom. If the target is not on the bottom, only 2D is going to see it.
Reviewing what you captured is its own skill
The pass is half the work. The review is the other half, and the review is where most missed contacts get found on a second look back at the dock.
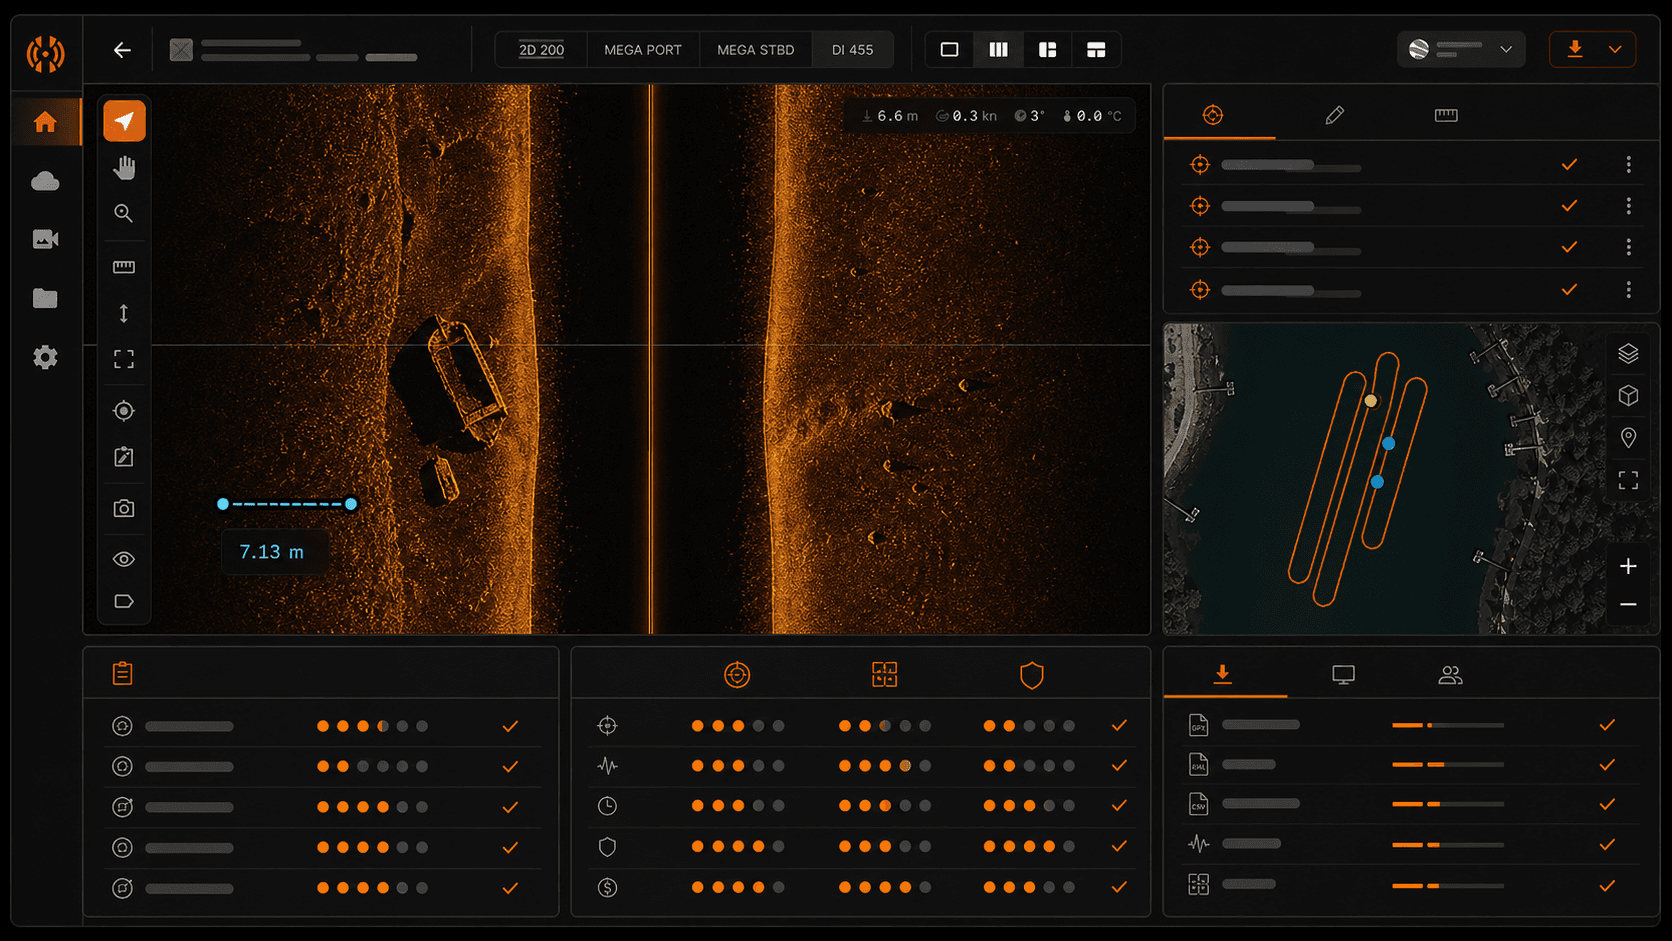
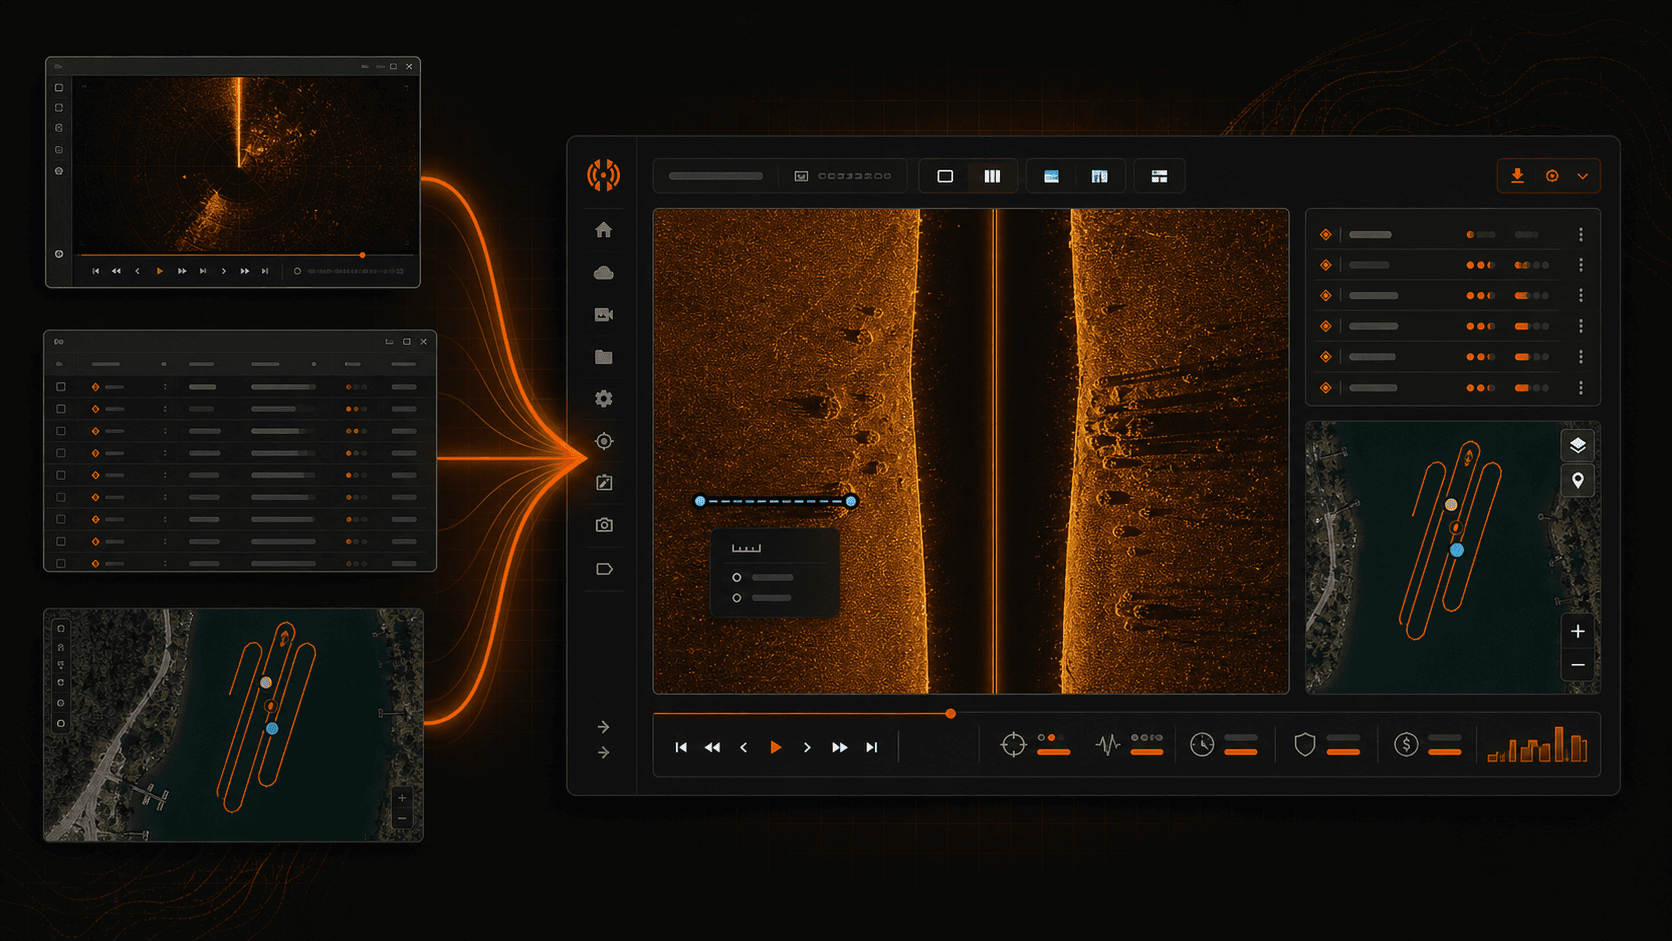
Every channel your unit was running during the search lives inside the recording. The .son, .dat, and .idx files store 2D, Down Imaging, Side Imaging, and MEGA together. A capable review workbench lets you load the recording and flip between channels at any given moment in the pass, so when you spot something interesting on Side Imaging you can immediately check Down Imaging and 2D at the same waypoint to triangulate the contact.
That is the part of the job that does not happen on the water. It happens at a desk, with coffee, scrolling carefully through a recording, marking what looks worth a second pass tomorrow. If you are choosing tools for this stage of the workflow, the buyer's guide for SAR teams walks through what to look for.
A starting point
HumVision is built for this review stage. It reads Humminbird .son, .dat, and .idx files directly, supports all four channels on Helix, Solix, and MEGA units, and is designed around the assumption that the person at the keyboard is working a case rather than logging a fishing trip.
The Pro tier is a one-time license of $99 for an individual operator, with a 30-day free trial so you can evaluate it on a real recording. If you want to try the review side after your next pass, start your free trial.
Is MEGA worth it for a recovery team?
It depends on water clarity and bottom type. In clear, shallow water over a relatively clean bottom, the resolution improvement from MEGA over standard Side Imaging is visible and operationally useful. In murky water, deep water, or water with heavy organic content, the additional detail gets lost in noise and attenuation, and standard 800 kHz Side Imaging often performs as well as MEGA does. If your team works mostly clear shallow lakes, MEGA earns its place. If you mostly work stained rivers and reservoirs, the upgrade matters less.
What about CHIRP?
CHIRP is not a separate channel in the way Side, Down, and 2D are. It is a transmission method. Instead of pinging at a single fixed frequency, a CHIRP transducer sweeps across a range of frequencies during each ping. That sweep gives the receiver more information to work with, which sharpens target separation and reduces noise on 2D and Down Imaging output. If your unit supports CHIRP, you are already benefiting from it on those two channels.
Can I review Lowrance or Garmin recordings in HumVision?
No. HumVision reads Humminbird .son, .dat, and .idx files by design. The recording formats from Lowrance and Garmin units are structured differently and are not supported. If your team runs mixed brands, you will need a separate workflow for non-Humminbird recordings.
In This Article
Share
30-day free trial
Try HumVision Pro
Real recording. Real case. 30 days. No charge if it doesn't fit.
Start your free trial